
How to Tell if Your Roof Is Ready for Winter Weather
West Texas winters look nothing like winters up north, and that fools a lot of homeowners into thinking their roofs get an easy season. Odessa and the surrounding Permian Basin see hard freezes, freezing rain, sleet, and long stretches of hard wind that arrive with every cold front dropping down out of the panhandle. Temperature swings of forty degrees inside a single day force shingles, flashing, and sealant to expand and contract until the weakest connection finally gives up. A small problem that goes unnoticed in August, like a lifted shingle tab or a cracked pipe boot, has a way of turning into an active leak by January when the weather makes repairs harder to schedule. Checking your roof now, while conditions are still warm and dry, gives you the time to plan and budget instead of reacting to water on a ceiling. Warm weather also matters for the work itself, because asphalt shingles rely on a heat activated adhesive strip that bonds properly in warm sun and struggles in the cold. Knowing what to look for ahead of the season is the difference between a quiet winter and an emergency call during a freeze.
Signs Your Roof Is Ready for Winter Weather
A roof announces its condition long before it fails, but only to people who know the signals. A roof that is genuinely ready for winter weather has shingles that lie flat and sealed, metal flashing that is tight and rust free, drainage that carries water away from the house, and an attic that breathes the way the manufacturer designed it to. Nearly every winter failure we see in Odessa traces back to something that was already loose, cracked, or clogged weeks or months before the first cold front. Wind driven rain and melting sleet find those weak points fast because water under wind pressure moves sideways and uphill, not just down. The good news is that many of these warning signs are visible from the ground with a decent pair of binoculars and an honest look at your ceilings and walls. Anything that looks questionable is worth a closer inspection from someone who walks roofs for a living rather than a guess from the driveway.
Shingle Condition That Shows a Roof Is Ready for Winter Weather
Start with the shingles themselves, because they are the primary water shedding layer and the part of the system that takes the most abuse from sun, heat, wind, and blowing sand. Healthy asphalt shingles lie flat against the deck with uniform color and a full coat of mineral granules covering the asphalt beneath. Those granules exist to block ultraviolet light, and once they wash away in quantity the asphalt underneath begins to dry, harden, and crack at an accelerating rate. Look for shingles that have started to curl at the corners, cup upward along the edges, or blister into small raised spots across the surface, since all three conditions mean the mat underneath has aged past its useful flexibility. Also watch for shingles that appear darker or shinier than their neighbors, which usually indicates bare asphalt where granules have already been lost. In a climate like ours, where surface temperatures on a dark roof can pass one hundred and fifty degrees in summer, shingles frequently reach the end of their service life several years earlier than the number printed on the wrapper suggests.
Wind is the other half of the shingle equation, and it deserves more attention here than in most parts of the country. Asphalt shingles are rated for high wind speeds only when the factory adhesive strip has fully bonded each course to the one below it, creating a continuous sealed surface that wind cannot get underneath. When a tab loses that bond, from age, from a previous storm, or from dust and sand working into the seam, the shingle becomes a small sail that flutters with every gust and works its fasteners loose a little more each time. From the ground you can often see this as a subtle ripple or shadow line across an otherwise flat plane, and on a breezy day you may actually see individual tabs moving. Missing shingles are obvious, but partially lifted ones cause just as many leaks and get overlooked constantly. A roof heading into winter with unsealed tabs is a roof waiting for the first thirty mile per hour cold front to peel a section back and expose the underlayment to freezing rain.
Age tells you a great deal even when the surface still looks acceptable from a distance. Three tab shingles installed in the Permian Basin commonly deliver somewhere in the range of fifteen to twenty years of real service, while quality architectural shingles often reach twenty to twenty five under the same sun. If your roof is inside the last few years of that window, the material has already lost much of the flexibility it needs to handle thermal cycling, and cold weather is exactly when brittle shingles crack. Check any documentation you have from the purchase of the home or the last replacement, and if you have no records at all, that alone is a reason to get a professional evaluation before the season turns. Homeowners often assume that a roof without visible leaks has plenty of life left, which is a reasonable assumption and frequently a wrong one. Leaks are a late symptom, not an early warning, and the goal of a preseason check is to catch the problem while it is still a repair instead of an emergency. Need a section of shingles looked at before the weather turns? Click here for our roof repair service.

Flashing and Sealant Checks That Prove a Roof Is Ready for Winter Weather
Flashing is metal, and metal is where the majority of winter leaks actually begin. Every place your roof surface meets something else, a wall, a chimney, a valley, a skylight, a vent pipe, requires a metal transition designed to carry water back onto the shingles instead of behind them. Step flashing runs up the sides of walls and dormers in individual overlapping pieces tucked under each shingle course, and counterflashing caps it where it meets masonry on a chimney. When any of that metal corrodes, pulls loose, or gets covered in a smear of roofing cement by a previous repair attempt, you have a direct path for water into the structure. Rust streaks running down a chimney or a wall are a reliable tell, as are gaps you can see daylight through from the attic side. Freezing rain makes flashing failures worse than ordinary rain does, because ice builds at these transitions and then melts slowly from underneath, giving water long unhurried contact with every seam.
Pipe boots deserve their own paragraph because they are the single most common leak source on Texas roofs. The rubber or neoprene collar that seals around each plumbing vent stack sits exposed to full sun with no shading whatsoever, and ultraviolet light degrades it steadily until it splits, usually somewhere between ten and fifteen years after installation. A cracked boot lets water run straight down the outside of the pipe, into the attic, and onto whatever is below, and homeowners often blame the shingles for a problem that costs very little to fix. From the ground you can sometimes see the collar looking chalky, gray, or visibly torn at the top where it wraps the pipe. Winter accelerates the failure because water that gets into an existing hairline crack expands as it freezes and widens the split. Replacing worn boots before the season is inexpensive preventive work, and it is one of the highest value items on any preseason checklist.
Exposed sealant is the third thing to examine, and the rule is simple: sealant should be a supporting player, never the main defense. Roofing cement and caulk are used at fastener heads, at counterflashing reglets, and at a handful of other legitimate details, but they dry out, shrink, and crack faster than any other component on the roof. If you see large gray or black smears of mastic slathered across valleys, around vents, or along a wall line, someone patched a real problem with a temporary material and the clock is already running on it. Exposed fastener heads on ridge vents, on metal edging, or on any panel roof should be checked as well, since the washers under those screws harden and the screws themselves back out slightly with each expansion and contraction cycle. Nail pops, where a fastener works its way up through the shingle above it, create small raised bumps that eventually wear through the shingle surface entirely. Any one of these is minor on its own; several of them together on a roof heading into freezing weather add up to a real risk of interior damage.
Attic and Ventilation Clues That a Roof Is Ready for Winter Weather
Some of the best information about your roof is available without ever going outside. Take a flashlight into the attic on a bright day, turn the light off for a moment, and look for pinpoints of daylight coming through the deck, especially along valleys, around penetrations, and near the ridge. Then look at the underside of the sheathing for dark staining, streaking, or a fuzzy white growth, all of which indicate that moisture has been present repeatedly. Run your hand along the insulation near the eaves and check for damp or compressed spots, since wet insulation loses most of its thermal value and rarely dries out on its own in cold weather. Rusty nail tips protruding through the decking are another useful clue, because they show condensation has been forming on cold metal. A dry attic with clean wood and fluffy even insulation is one of the strongest indicators that a roof system is genuinely prepared for the season.
Ventilation is the part of the system homeowners understand least and the part that quietly determines how long a roof lasts. A properly vented attic pulls cool outside air in through soffit or eave intake vents and pushes warm moist air out through ridge vents, turbines, or box vents near the peak. Building standards generally call for one square foot of net free ventilation area for every one hundred and fifty square feet of attic floor, or one per three hundred when intake and exhaust are balanced and a vapor retarder is present. When intake is blocked by insulation shoved into the eaves, or when exhaust is inadequate, warm humid indoor air collects against cold sheathing during a freeze and condenses into liquid water that drips back down onto the insulation and ceiling. Homeowners frequently report this as a roof leak, and it is instead a ventilation failure that no amount of shingle work will solve. Getting the airflow right before winter protects the deck, the insulation, and the shingles all at once.
Ice dams are less common in Odessa than in colder regions, but they are not unheard of, and the mechanism is worth understanding. When heat escapes from the living space into the attic, it warms the roof deck and melts snow or accumulated sleet on the upper portion of the roof, and that meltwater runs down until it reaches the cold overhang beyond the exterior wall where it refreezes into a ridge of ice. Water then backs up behind that ridge and works its way under the shingles, which are designed to shed water flowing downhill and not to hold standing water. Adequate insulation on the attic floor and good airflow above it keep the deck close to outside temperature and prevent the melt and refreeze cycle from starting. Sealing gaps around recessed lights, attic hatches, and duct penetrations makes a measurable difference in how much heat reaches the underside of the roof. These are inexpensive corrections compared to repairing water damaged drywall, insulation, and framing after the fact.
How to Inspect a Roof Before Winter Weather Arrives
A useful preseason inspection follows an order, moving from the safest and easiest observations to the ones that require training and equipment. You can accomplish a surprising amount from the ground, from inside the attic, and from a quick check of your gutters without ever setting foot on a ladder. The purpose of a homeowner level check is not to diagnose everything; it is to determine quickly if the roof deserves a professional set of eyes before winter weather arrives. Walking a roof is genuinely dangerous, particularly on steeper pitches, on older brittle shingles, and on any surface with dust or moisture on it, and foot traffic from an untrained person can crack shingles and create the exact leaks you were trying to prevent. Give yourself an hour on a calm clear morning and work through the exterior, the drainage, and the attic in sequence. Write down what you find, take photos, and use that record as the starting point for a conversation with a roofing contractor.
Ground Level Inspection Steps Before Winter Weather
Start at the street with binoculars and walk the full perimeter of the house, looking at each roof plane from at least two angles so that low sun does not hide defects in shadow. Scan the field of the shingles for missing tabs, dark patches of exposed asphalt, lifted corners, and any area where the surface texture changes noticeably from the surrounding roof. Follow every ridge line and hip, since ridge cap shingles are the most exposed pieces on the entire roof and often fail first under sustained wind. Check the valleys, where two planes meet and the largest volume of water concentrates, and look for debris piles, worn granules, or metal that has pulled apart at a seam. Look carefully at the edges of the roof where drip edge metal should run continuously along the eaves and rakes, protecting the fascia and directing water into the gutter. Anything you cannot see clearly should go on the list for closer inspection rather than being dismissed.
Next, examine everything that sticks up through the roof, since penetrations account for a large share of all leaks regardless of season. Count your vent pipes and look at the collar on each one for cracking, gaps, or a boot that has slid up the pipe. Study the chimney where it passes through the roof plane and look at the mortar joints, the crown at the top, and the metal flashing wrapping the base. Check any skylight for a cracked lens, failed glazing seal, or condensation between panes, and note the condition of the flashing kit around its curb. Look at the turbines, box vents, or ridge vent for dented housings, missing fasteners, or bent baffles that would let wind driven rain enter directly. On a home with satellite dishes, solar attachments, or old antenna mounts, remember that each anchor was a hole drilled through the roof and each one needs a functioning seal.
Finish the exterior walk by looking at the parts of the house that reveal roof problems indirectly. Peeling paint or stained soffit boards along the eaves usually indicate water spilling behind the gutter or moisture escaping from a poorly vented attic. Rust stains on siding below a wall to roof transition suggest failing step flashing. Look for granules collecting at the base of downspouts and in the flower beds beneath the roof edge, since a heavy accumulation means the shingle surface is shedding its protective layer faster than it should. Inside the house, walk each room and inspect ceilings and the tops of exterior walls for faint discoloration, bubbling paint, or a slightly different sheen in the drywall texture. Old stains that have dried can look deceptively minor, and the only way to know if the source is still active is to trace it from the attic side during or after a rain. Want a professional evaluation of what you found? Click here for our roof repair service and we will take a look before the weather turns.
Gutter and Drainage Inspection Before Winter Weather
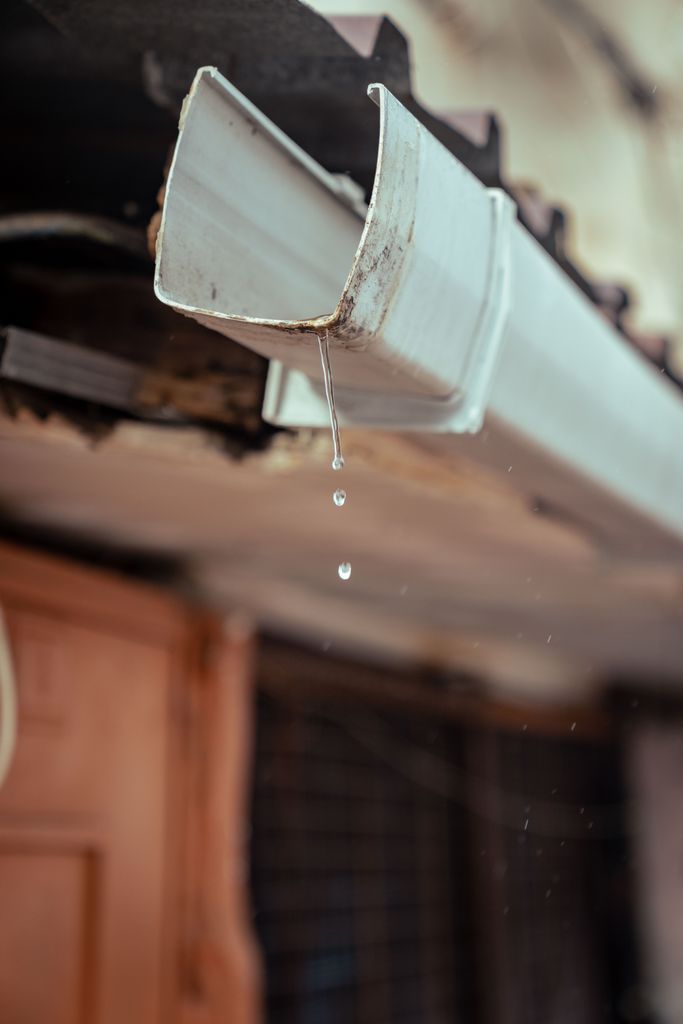
Drainage gets treated as a landscaping issue when it is actually a roofing issue, and neglected gutters cause an outsized amount of winter damage. Clear every gutter run of leaves, twigs, dust, and the mud that accumulates from blowing dirt during dry windy months in West Texas. A clogged gutter fills with water that has nowhere to go, and when that water freezes it becomes a heavy block of ice pressing outward on the hangers and downward on the fascia. That weight loosens gutter spikes and screws, pulls sections away from the house, and can rot the fascia board behind it. Once the gutter tilts away from the wall, water spills directly along the foundation, which creates a second and more expensive category of problem entirely. Twenty minutes with a hose after cleaning tells you if every downspout is actually flowing.
While you have the gutters clear, look at what is sitting in the bottom of them, because they function as a collection tray for evidence about your shingles. A light dusting of granules is normal on any roof and especially on a newer one still shedding loose material from manufacturing. Piles deep enough to scoop by the handful, or granule accumulation concentrated below one particular slope, indicate accelerated wear that deserves investigation. Check the gutter interior for rust perforation and check the seams at corners and end caps for separation, since those joints open up as the metal expands and contracts. Confirm that downspouts discharge at least several feet away from the foundation and that any extensions or splash blocks are still in position. Water managed properly at the roof edge protects the fascia, the soffit, the siding, and the slab all at once.
Low slope areas need particular attention because they drain slowly by design and hold water when anything obstructs the flow. Patio covers, porch roofs, and additions frequently use a low slope membrane rather than shingles, and those surfaces rely on positive drainage toward a scupper or drain. Ponding water that remains standing more than a day or two after rain accelerates membrane breakdown and adds significant weight to the structure. When that standing water freezes and thaws repeatedly through a West Texas winter, it works into seams and around fasteners with real force. Clear the debris, verify the drains are open, and look closely at any patch, seam, or flashing detail on those surfaces. A membrane roof that is already tired going into the season is unlikely to improve on its own.
When to Call a Roofer Before Winter Weather
Certain findings mean the homeowner portion of the inspection is over and it is time to bring in a contractor. Any active or recent water stain on a ceiling, any visible daylight through the deck, and any missing or displaced shingle should be treated as urgent regardless of how the rest of the roof looks. Widespread granule loss, multiple curled or cracked shingles, or a roof approaching the end of its expected service life all call for a professional assessment of remaining life rather than a patch. If your home has been through a hail event or a high wind storm in the last couple of years and was never inspected afterward, that is reason enough on its own. Storm damage frequently produces bruising and fractured mats that are invisible from the ground and that fail months later when weather stresses them.
Timing matters more than most homeowners expect when it comes to roofing work in cold weather. Asphalt shingles seal through a thermally activated adhesive strip that needs warm surface temperatures and direct sun to bond fully, which is why shingles installed during a cold stretch may need hand sealing to reach their rated wind performance. Scheduling repairs or a replacement while daytime temperatures are still comfortable produces a better bonded, better performing roof. Contractor availability also tightens dramatically after the first major weather event of the season, when everyone with a leak calls at once. Getting on a schedule early means the work happens on a planned timeline instead of an emergency one. It also means you can gather estimates, review options, and make a decision without water running into the house while you think it over.
There is one more reason to act early that comes down to simple economics. A repair caught in time addresses a single component, a boot, a flashing detail, or a small section of shingles, while the same issue left through a winter can involve decking, insulation, drywall, paint, and sometimes framing. Insurance treats sudden storm damage differently from gradual deterioration, and a leak that has been quietly working for months often falls outside coverage as a maintenance issue. Documentation from a preseason inspection also establishes the condition of your roof before any storm arrives, which is genuinely useful if you need to file a claim later. Homeowners who inspect on a schedule almost always spend less over the life of the roof than those who wait for symptoms. Preparing before winter is the least expensive roofing decision available.
Why You Need a Professional Roof Inspection Before Winter Weather
A trained inspector sees things that simply do not register from the ground, and that difference is worth real money. Roofers walk the surface, lift shingles to check the seal, examine fastener patterns, probe soft decking, and evaluate flashing details at close range where problems actually reveal themselves. They also assess the roof as a system, connecting attic conditions, ventilation performance, drainage, and surface wear into one picture rather than a list of unrelated observations. That systems view is what determines if you need targeted repairs, a maintenance visit, or a full replacement before the season turns. It also gives you an honest timeline, so you know if you are dealing with a problem for this month or a plan for next year. The inspection itself costs you nothing with PB Roofing, and the information it produces protects one of the largest investments you own.
What a Professional Roof Inspection Before Winter Weather Includes
A thorough preseason inspection begins on the roof surface, where the inspector documents shingle condition plane by plane, checks the seal on random tabs, and photographs anything worn, lifted, or damaged. Every penetration gets inspected individually, including pipe boots, vents, skylights, chimneys, and any equipment curb, since these details fail long before the field of the roof does. Valleys, ridges, hips, and rake edges receive close attention because concentrated water flow and wind exposure make them the busiest parts of the system. The inspector also checks decking condition by feel, noting any soft or springy areas that suggest moisture has already reached the plywood. Photographs of each finding give you a clear record of exactly what was observed and where.
The inspection then moves to the attic and the drainage system, which together explain most of what happens on the surface. Inside the attic, the inspector looks for daylight, staining, damp insulation, rusted fasteners, blocked soffit intake, and inadequate exhaust ventilation. Outside, the gutters, downspouts, drip edge, fascia, and soffit are evaluated for their ability to move water away from the structure through freezing weather. Findings from both areas connect back to the surface observations, which is how a good inspector distinguishes a shingle problem from a ventilation problem. That distinction saves homeowners from paying for the wrong solution.
You should finish the process with a written summary, clear photographs, and a straightforward explanation of your options and their costs. A good contractor will tell you plainly when a roof needs nothing at all, when a modest repair will carry it through several more seasons, and when replacement is the responsible choice. You should never feel pressured toward the largest possible job or handed a quote without an explanation of what drives the number. Ask questions about material choices, warranty terms, and timeline, and expect direct answers. That transparency is the entire point of getting an expert involved before the weather forces your hand.
Repair or Replace Before Winter Weather
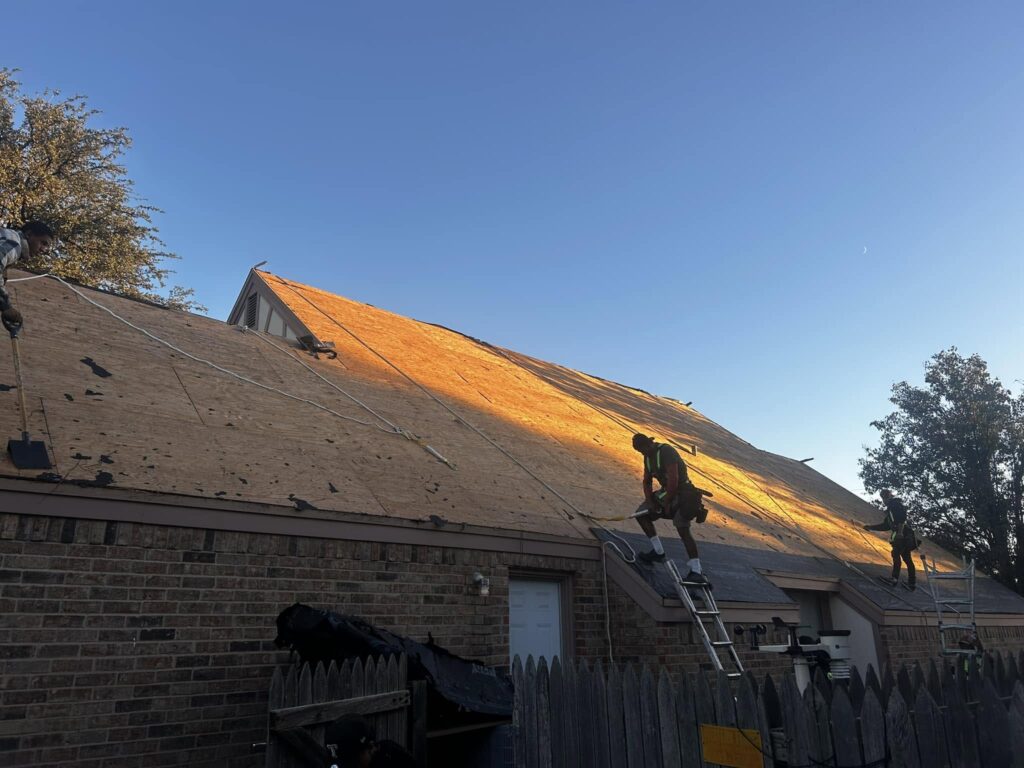
The decision between repair and replacement comes down to a few practical factors rather than a single rule. Isolated damage on a roof with good remaining life, like a cracked boot, a few wind lifted shingles, or a section of failed flashing, is almost always a repair, and a well executed repair can serve for years. Widespread granule loss, brittle cracking across multiple planes, repeated leaks in different locations, or a roof already past its expected service life point toward replacement instead. Decking that has absorbed moisture and lost strength also pushes the decision, since new shingles cannot be fastened reliably to compromised wood. An honest inspector will show you the evidence behind the recommendation rather than asking you to take it on faith.
Cost timing works in your favor when you make this decision before the season rather than during it. Replacement performed in mild weather allows shingles to seal properly under sun and warmth, gives crews safe working conditions, and avoids the scheduling crunch that follows every major storm. It also lets you compare estimates, select materials deliberately, and coordinate the project around your own calendar. Emergency replacement during a freeze offers none of those advantages and typically costs more in collateral repairs to the interior. Planning ahead converts a stressful event into a manageable project.
PB Roofing structures its repair pricing to make the decision easier on homeowners who are close to the line. Every dollar you spend with us on roof repairs is credited in full toward a future replacement, so investing in a repair now never becomes wasted money later if the roof turns out to need more. That policy exists because we would rather earn a long relationship than push anyone into a project before they are ready. Ready to talk about a full replacement with a four year labor warranty behind it? Click here for our roof replacement service.
Why Choose PB Roofing for Winter Weather Roof Preparation
PB Roofing works out of Odessa and serves homeowners and businesses across the Permian Basin, including Midland, West Odessa, Andrews, Big Spring, Monahans, Kermit, Pecos, Seminole, Lamesa, and Fort Stockton. We hold an A+ rating with the Better Business Bureau and stand as a preferred contractor for both IKO and Owens Corning, which reflects the standards our crews are held to on every project. Every replacement job carries a four year labor warranty in addition to the manufacturer coverage on the materials themselves. We provide a free estimate with no obligation on every project, so getting an expert opinion on your roof costs you nothing but the time it takes us to look.
Local experience matters more in this region than in most, because the combination of intense summer sun, blowing sand, spring hail, and sharp winter freezes creates a specific pattern of wear that our crews recognize immediately. We know which shingle types hold up on Permian Basin roofs, how ventilation should be configured for our climate, and which details fail first on homes built in each era around Odessa and Midland. That familiarity translates directly into recommendations that fit your actual situation instead of a generic checklist. We also handle commercial work and commercial painting, which means one contractor can cover an entire property.
Getting your roof evaluated before the first cold front is the simplest way to protect your home through the season, and the process starts with one phone call. Our team will inspect the roof, the attic, and the drainage, walk you through the photographs and findings, and give you a clear written recommendation with no pressure attached to it. Repairs, replacement, or nothing at all, you will get a straight answer about what your roof needs and when it needs it. Call PB Roofing at (432) 853-7270 to schedule your free inspection, or reach out to us at sean@roofingpb.com, and let us make sure your roof is ready before winter weather puts it to the test.