
What Happens During a Professional Roof Inspection
A professional roof inspection is a structured review of every part of your roof system, not a quick look from the driveway. Roofs in the Permian Basin absorb hail strikes, wind gusts past sixty miles per hour, blowing caliche dust, and months of direct sun that pushes surface temperatures well past 150 degrees. Damage from all four often hides in plain sight; a shingle can lose its protective granules or take a hail bruise without ever dripping a single drop of water. By the time a stain appears on a bedroom ceiling, the decking above it has usually been wet for months. A trained inspector hunts for the early signals instead of the obvious ones. The process moves through the ground, the roof surface, the flashings and penetrations, the attic, and the documentation that follows. Most inspections on a standard Odessa or Midland home run between forty five minutes and two hours depending on size, pitch, and complexity. Understanding what happens at each stage makes the findings far easier to act on, and it makes you much harder to mislead.
What Happens During a Professional Roof Inspection on the Outside of Your Home
The exterior portion of a professional roof inspection begins before the ladder ever comes off the truck. An inspector reads the entire property first, because the roof is only one piece of the evidence. Hail that dented a downspout on the north side of the house almost certainly struck the north facing slope. Wind that peeled fascia wrap on the west elevation very likely lifted shingles on the west planes as well. Once the ground work is finished, the inspector moves onto the roof itself and covers every slope, valley, ridge, hip, and penetration. Findings are photographed as they are discovered, so nothing depends on memory hours later. Chalk marks help document hail strikes and damaged sections in a way an insurance adjuster can verify on a second visit. The goal is a complete picture of the roof’s condition, not a rushed hunt for one leak.
The Ground Level Start of a Professional Roof Inspection
Every professional roof inspection opens with a slow walk around the full perimeter of the structure. The inspector studies the soft metals first, since aluminum and thin steel dent long before an asphalt shingle shows visible damage. Gutters, downspouts, window wraps, garage door panels, fence caps, mailboxes, and the fins on your air conditioning condenser all record hail impacts like a fingerprint. Counting those dents and noting which elevations carry them tells the inspector the approximate size of the stones and the direction the storm traveled. That information matters enormously later, because it either supports or contradicts what shows up on the roof surface. Window screens with torn mesh, splintered fence pickets, and pockmarked patio furniture add to the record. An inspector who skips this step is working with half the story.
Next comes the debris evidence sitting at ground level. Granules washing into gutters, piling at downspout outlets, or collecting in driveway cracks point to a surface that is shedding its protective layer faster than normal. A small amount of granule loss is expected during the first year after installation, and a good inspector knows the difference between factory excess and real deterioration. Standing back forty or fifty feet gives the sightlines needed to spot a sagging ridge line, a wavy plane where the decking has softened, or slopes that no longer sit flat and uniform. The rake edge reveals how many layers of roofing are stacked on the house, which affects both cost and code compliance on any future tear off. Drip edge metal either exists along the eaves or it does not, and its absence is a common finding on older Odessa homes. Tree limbs resting on shingles get flagged too, because constant abrasion wears granules off in a narrow scrubbed path. All of this happens before anyone climbs anything.
The last part of the ground assessment covers the walls and previous work. Painted surfaces, siding, stucco, and trim get checked for impact marks, chalking, and moisture staining that suggests water is escaping the roof system somewhere above. Mismatched shingle patches, tar smeared over old repairs, and caulk piled around penetrations all signal a roof that has been patched rather than maintained. Satellite dishes, solar attachments, and swamp cooler stands are noted because each one required fasteners driven through the roof deck. The inspector also confirms a safe ladder setup on stable ground with proper extension above the eave, since a fall from a single story roof can end a career. Homeowners should not attempt this portion themselves; heat softened shingles scuff badly under untrained feet, and that scuffing can void portions of a manufacturer warranty. A ground level look is useful, but it never replaces trained eyes on the deck.
The Rooftop Walk in a Professional Roof Inspection
Once on the roof, the inspector follows a deliberate pattern rather than wandering. Each slope gets walked separately, usually starting at the eave and working toward the ridge in overlapping passes. Pitch determines the approach; anything above an 8 in 12 typically calls for rope, harness, or a ladder assist rather than free walking. On low slope sections common to Permian Basin additions and patio covers, the inspector checks seams, laps, and ponding areas instead of individual shingles. Foot placement matters in July, because asphalt reaches temperatures that make the mat pliable and easy to mark. A careful inspector steps on the thickest portion of each course to avoid creating the very damage he is documenting. Every slope gets covered, including the ones nobody sees from the street.
Hail identification is the most technical part of the walk. A true hail bruise is a round impact that fractures the fiberglass mat beneath the surface, knocks granules loose, and feels soft when pressed with a thumb, similar to a bruise on fruit. Blisters, manufacturing defects, and mechanical scuffs from foot traffic look similar to an untrained eye but carry sharp edges, irregular shapes, or exposed asphalt without any mat fracture. Inspectors mark a ten foot by ten foot test square on each slope with chalk and count the qualifying impacts inside it. Most insurance carriers consider a slope damaged when that square holds roughly eight to ten hits, though thresholds vary by company and policy. Direction matters as well, since real hail damage concentrates on the slopes facing the storm and thins out on the sheltered sides. Documenting all of it with photographs protects you if a claim is ever questioned.
Wind and age damage round out the surface review. Creased shingles, where a tab was folded back by a gust and dropped again, break the sealant strip and leave the course below exposed to blowing rain. Tabs that lift with light hand pressure indicate failed adhesive, a frequent finding on roofs past the twelve year mark in this climate. Exposed fastener heads, backed out nails, and popped ridge cap staples create direct entry points for water. Curling edges, cupping, and brittle shingles that crack when flexed all point to heat and ultraviolet exposure rather than storm impact. Damaged ridge cap, missing hip shingles, and worn valley material get noted individually with their locations. The inspector separates what needs immediate repair from what simply needs monitoring, because those are two very different conversations.
Flashing, Boots, and Penetrations in a Professional Roof Inspection
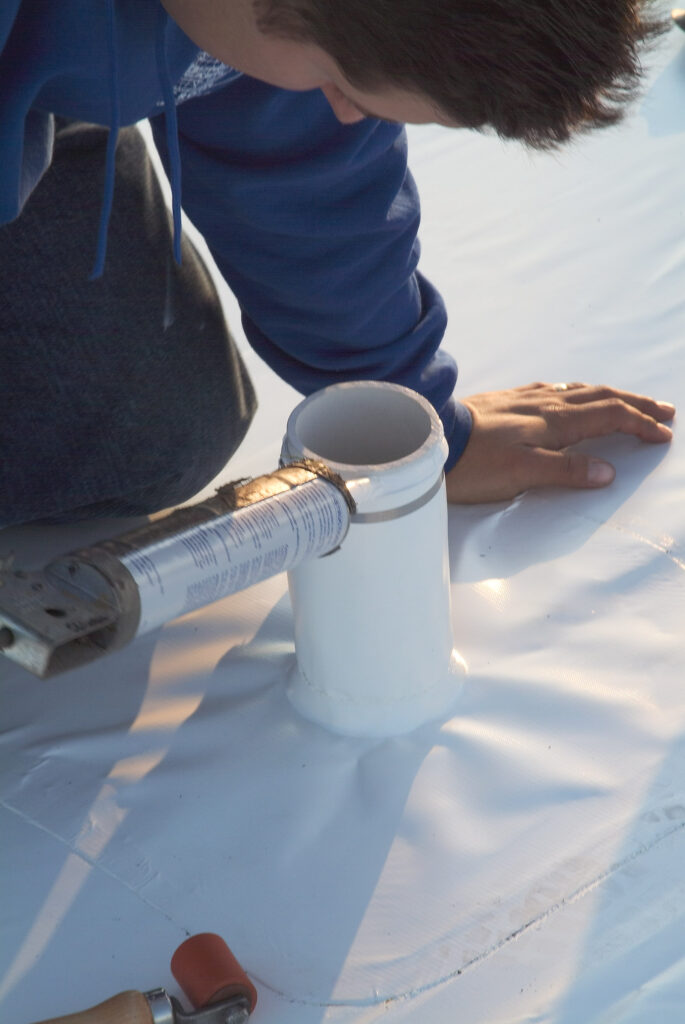
Most roof leaks in West Texas do not start in the middle of a shingle field. They start at penetrations, and the plumbing vent boot is the single most common culprit. The rubber collar sealing that pipe hardens and splits under constant sun, usually somewhere between eight and twelve years in this region, long before the shingles themselves wear out. A professional roof inspection includes a close look at every boot on the roof, checking the collar for cracks, the base flange for lifting, and the surrounding shingles for staining. Replacing a failed boot is inexpensive; replacing the sheathing, insulation, and ceiling drywall it ruined is not. Inspectors also check furnace and water heater flues, which use a different flashing detail and often sit near the ridge. Each one gets photographed with enough surrounding context to locate it later.
Wall terminations and chimneys receive the same scrutiny. Proper step flashing tucks behind each shingle course and up under the siding or into a masonry reglet, and it cannot be replaced by a bead of caulk without inviting failure. Counter flashing that has pulled loose from mortar joints, rusted through, or been sealed with roofing cement is flagged as a repair item. Wide chimneys need a cricket on the uphill side to divert water around them, and older homes frequently lack one. Kick out flashing at the point where a roof edge meets a wall directs water into the gutter instead of behind the siding, and its absence causes rot that stays hidden for years. Skylight curbs, if present, get checked at all four corners where the flashing laps. Sealant is treated as maintenance, never as a substitute for correct metal.
Valleys, edges, and equipment mounts finish the exterior review. Open metal valleys are inspected for rust, debris packing, and fasteners driven too close to the center where water concentrates. Closed cut valleys get checked for the sharp cut line pulling away or shingles cracking along the fold. Drip edge should extend past the fascia and over the gutter lip so runoff never wicks backward into the wood. Evaporative cooler stands, HVAC curbs, satellite mounts, and antenna brackets all get lifted and examined at their fasteners, since each one punctures the deck. Anywhere two roof planes or two materials meet is a suspect until proven otherwise. Have a leak that needs attention right now? Click here for our roof repair service.
What Happens During a Professional Roof Inspection Inside the Attic
The attic tells the truth about a roof faster than the shingles do. Water that gets past the surface leaves marks on the underside of the decking, on rafters, and in the insulation, and those marks persist long after the stain on the ceiling has dried. An inspection that stops at the ridge misses the interior half of the system entirely. Access is usually through a hallway or garage hatch, and the inspector works with a bright light while stepping only on framing members. Summer attic temperatures in Odessa routinely climb above 140 degrees, so this portion is done quickly and methodically. The inspector is looking for staining, daylight, rot, compressed or displaced insulation, mold growth, and airflow problems. Findings inside get matched against findings outside to pinpoint exactly where water is entering. That pairing is what separates a real diagnosis from a guess.
The Decking and Daylight Check in a Professional Roof Inspection
Sheathing condition drives the cost of any future roof project, which makes this portion of the inspection financially important. The inspector scans the underside of the deck for dark rings, streaking below nail heads, and delamination where plywood layers have separated. Wood that appears darkened but stays firm under pressure may simply be old; wood that gives way indicates active rot requiring replacement. Older Odessa and Midland homes sometimes have spaced board decking rather than solid sheathing, which changes how a new roof must be installed and often triggers additional decking costs. Nail penetrations should appear in consistent rows matching the shingle courses above, and clusters of shiners pointing in random directions suggest sloppy prior work. Any soft, spongy, or bowed section gets measured and photographed. A homeowner who learns about failing decking during an inspection avoids an unpleasant surprise on tear off day.
Daylight is the simplest and most useful diagnostic in the attic. Pinpoints of light around a vent pipe, at a valley, along a ridge, or at the eave mean there is a physical opening in the roof assembly. Not every point of daylight is a leak, since some ventilation components are designed to allow air movement, and a good inspector knows the difference. Light showing where solid decking should be is always a defect. The inspector traces each opening back to its exterior counterpart and documents both sides of the same problem. Storm damage frequently shows here first, especially after wind lifts a section of shingles and leaves the underlayment torn. Photographs from inside give an adjuster something concrete that no amount of debate can dismiss.
Framing gets a review as well. Rafters, trusses, and collar ties are checked for cracks, prior repairs, sagging, and separation at connection points. Truss members that have been cut or notched for storage platforms or ductwork represent a structural concern that goes beyond roofing. Water staining that runs down a rafter face rather than dropping straight down usually means the entry point sits higher up the slope than the ceiling stain suggests. Rusted nail tips and frost or condensation marks point to a moisture and ventilation issue instead of an active leak. In West Texas, condensation problems are less common than in humid climates, though poorly sealed bath fans and dryer vents dumping into the attic still cause them. Every observation gets tied to a location so the repair plan can be specific rather than general.
Moisture, Stains, and Insulation Findings in a Professional Roof Inspection
Insulation acts like a sponge and a record keeper at the same time. Batts that are matted, discolored, or compressed in one area almost always sit directly beneath a leak, even when the deck above has since dried. Blown cellulose or fiberglass develops crusted patches where repeated wetting has occurred. Wet insulation loses most of its thermal value, which shows up as higher cooling costs during Permian Basin summers. The inspector notes both the moisture evidence and the overall depth of insulation, since many homes built before current energy standards carry far less than they should. Displaced insulation around the attic hatch and near recessed light fixtures is common and easy to correct. These findings often explain a comfort complaint the homeowner had never connected to the roof.
Active moisture and past moisture require different responses, so distinguishing between them matters. A moisture meter reading on decking and framing gives a numeric value rather than a visual guess, and readings are taken in several spots for comparison. Fresh water intrusion produces damp wood, a distinct smell, and sometimes visible dripping during or shortly after rain. Old intrusion leaves stains with defined dry edges, often ringed like a coffee mark, and reads normal on a meter. Mold and mildew growth on sheathing indicates repeated wetting over an extended period and needs remediation alongside the roof work. Documenting the difference protects you during a claim, because carriers routinely deny long term deterioration while covering sudden storm damage.
Mechanical systems in the attic get a look because they interact with the roof constantly. Bath exhaust fans and dryer vents must terminate outside the building through a proper roof or wall cap, never into open attic space. Disconnected flex duct is a frequent finding and dumps humid air directly against cold sheathing. HVAC units and duct runs housed in the attic produce condensate that can drip onto insulation and mimic a roof leak precisely. Overflow pans with clogged secondary drain lines cause ceiling stains that have nothing to do with the shingles above. Ruling these out prevents a homeowner from paying for roof work that was never going to solve the problem. Honest inspectors tell you when the water is not coming from the roof.
The Attic Ventilation Review in a Professional Roof Inspection
Ventilation is the piece homeowners hear about least and pay for most. The accepted standard calls for one square foot of net free ventilating area for every 150 square feet of attic floor, which can be reduced to one per 300 when a proper vapor retarder is present and intake and exhaust are balanced roughly evenly. An inspector measures the attic footprint, counts the existing vents, and calculates actual net free area rather than eyeballing it. Intake comes from soffit or eave vents; exhaust comes from ridge vents, box vents, or turbines near the top of the slope. Insulation pushed tight against the roof deck at the eaves blocks intake completely, a defect corrected with baffles during a replacement. Undersized ventilation is one of the most common findings on homes across Odessa, Midland, and West Odessa.
Mixing exhaust types creates a problem that looks fine from the street. A ridge vent installed alongside powered attic fans or turbines lets the stronger exhaust pull air from the weaker vent instead of from the soffits, a short circuit that leaves most of the attic stagnant. The inspector identifies these conflicts and recommends a single consistent exhaust strategy. Heat trapped against the underside of the deck cooks shingles from below and shortens their service life measurably in a climate like ours. Cooling bills climb at the same time, since a superheated attic radiates into the living space through the ceiling. Correcting ventilation during a replacement costs very little compared to doing it as a separate project later.
Warranty coverage depends on it too. Manufacturers including IKO and Owens Corning require adequate attic ventilation as a condition of their shingle warranties, and a documented deficiency gives them grounds to deny a claim years down the road. An inspection report that records the current net free area protects you by establishing what existed before any work began. If the numbers fall short, the fix is specified as part of the scope rather than discovered halfway through installation. Balanced airflow also reduces the temperature swings that loosen fasteners and stress sealant strips over time. Ready to talk about a properly ventilated new roof? Click here for our roof replacement service.
Why You Need a Professional Roof Inspection in West Texas
The Permian Basin runs one of the more punishing roof climates in the country. Spring and early summer bring hail, straight line winds knock shingles loose several times a year, and relentless ultraviolet exposure ages asphalt faster here than in milder regions. Blowing sand and caliche dust scour granules from the surface in a way most of the country never deals with. A roof inspected once a year, plus once after any significant storm, catches problems while they are still cheap to solve. Waiting until water appears indoors usually means paying for decking, insulation, drywall, paint, and sometimes flooring on top of the roof work. Regular inspections also build a documented history of your roof’s condition, which carries real weight when an insurance claim is filed.
Scheduling a Professional Roof Inspection After Hail and Wind
Timing affects outcomes more than most homeowners realize. Insurance policies generally require prompt notice of a loss, and many carriers limit how long you have to report storm damage, often one to two years from the date of the event. A roof inspected soon after a hailstorm produces fresh, clearly datable evidence rather than damage a carrier can attribute to age or prior storms. Waiting also gives small openings time to let water into the deck, converting a covered sudden loss into deterioration the policy excludes. If hail fell anywhere near your neighborhood, an inspection is worth scheduling even when the roof looks untouched from the ground.
Be careful about who shows up at your door after a storm. Out of state crews follow hail across the country, sell aggressively, and are frequently gone before any warranty gets tested. Texas law requires homeowners to pay their insurance deductible, and any contractor offering to cover, waive, or absorb it is asking you to participate in something illegal. A legitimate inspector gives you a written report and photographs regardless of what you decide to do next. Pressure to sign on the spot is a warning sign, not a special offer. Local companies with a permanent address in the Basin have to live with their work.
Coverage across the region makes a difference when a storm hits a specific town rather than the whole area. Hail patterns are narrow, and one community can take golf ball sized stones while another ten miles away gets nothing but rain. A contractor already working throughout the Permian Basin can respond quickly instead of waiting for enough volume to justify the drive. That matters most in the days right after a storm, when tarping and temporary protection prevent further interior damage. Need an inspector in your town? Click here to see our Midland service area.
What Your Professional Roof Inspection Report Should Include
A verbal summary is not a report. Real documentation includes dated photographs of every finding, clear descriptions of location and severity, measurements of the roof surface, and a written assessment of remaining service life. Test square photographs with chalk marks and impact counts should be included for any hail claim. Attic findings belong in the same document as exterior findings, since the two together prove where water is entering. Ventilation calculations, decking condition, and layer count all affect future cost and should be stated plainly. You should be able to hand that report to an adjuster, a second contractor, or a future buyer without explanation.
The report should also separate urgency levels honestly. Some items need attention this week, some can wait until fall, and some are simply worth watching at the next annual visit. Inflating every finding into an emergency is a sales tactic, not an inspection. A trustworthy report will sometimes conclude that your roof is in good shape and needs nothing at all. That answer costs the contractor a sale and earns your trust for the day you actually need work done. Homeowners deserve enough information to make their own decision.
Repair versus replacement is the question most reports must ultimately answer. Age, damage extent, decking condition, number of existing layers, and shingle availability all feed that recommendation. A twelve year old roof with a single failed boot needs a repair, not a replacement, and any contractor claiming otherwise should be questioned. A twenty year old roof with widespread hail bruising across three slopes is a different situation entirely. Good reports show the reasoning rather than just the conclusion, so the choice stays in your hands.
Why Choose PB Roofing for Your Professional Roof Inspection
PB Roofing holds an A+ rating with the Better Business Bureau and works out of a permanent Odessa location, not a truck passing through after a storm. Our crews serve Odessa, West Odessa, Midland, Andrews, Big Spring, Monahans, Kermit, Pecos, Seminole, Lamesa, and Fort Stockton year round. Every inspection comes with a free estimate and no obligation to schedule work. We document what we find with photographs and give you the report to keep. If the roof does not need work, we say so.
Our credentials reflect long term commitment rather than short term volume. PB Roofing is a preferred contractor for both IKO and Owens Corning, which means access to manufacturer backed materials and proper warranty registration on completed installations. Every replacement carries a four year labor warranty on top of the manufacturer coverage on the shingles themselves. We also apply full credit from any roof repair toward a future replacement, so paying for a repair now never costs you later. That policy exists because we would rather keep a customer for twenty years than upsell one today.
Roofs fail quietly in West Texas, and the difference between a boot replacement and a full deck repair is usually a matter of months. An inspection takes an hour or two and gives you a clear, documented picture of exactly where your roof stands. Storm season has already moved through the Basin this year, and plenty of homes are carrying damage nobody has looked for yet. Click here for our roof installation service or call PB Roofing at (432) 853-7270 to schedule your free professional roof inspection, and you can also reach us anytime at sean@roofingpb.com.